Looking for a way to change the default file icons in Windows? Windows XP has some decent icons for your shortcuts like My Computer ![]()
You can change the icons in Windows in two ways: manually by going to Properties or by using some icon tweaking programs. I’ll go through both methods just in case you prefer one over the other.
Firstly, you’ll need to have your icons ready that you want to use in place of the default icons. You can either download icons in .ICO format or download icon libraries (DLL), icon packages, or even know the executable file that contains the icons you want.
I’ve written several posts earlier on how to find icons and how to extract icons from EXE, DLL, and other file types, so read those posts first if you don’t already have a set of icons ready.
Change File Icon in Windows
So first, let’s go through the manual way of changing icons in Windows. There are two sets of icons: icons for file types and Windows icons, like My Computer, etc. Changing each set requires different steps. First let’s start out with Windows icons.
Step 1: Right-click on the desktop and choose Properties.
Step 2: Click on the Desktop tab and click on the Customize Desktop button.
Step 3: You’ll now see the default Windows icons in the scrollable box. It should contain My Computer, My Documents, My Network Places, and Recycle Bin (full and empty).
Step 4: Click on any of the icons and choose Change Icon. You’ll now have the option to browse for icons, icon files, programs and libraries.
And that’s it! You’ve now changed the icon to something a little more to your liking hopefully!
Change File Type Icon in Windows
Now what about all those files? Whatever program you install on your computer always has some kind of icon associated with it. There is one that shows up on the desktop, one for the quick launch bar, etc. You can also change these quite easily.
Again, you’ll need to already have the icons ready before going through the next steps.
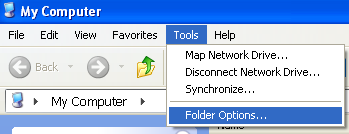
Step 1: Open My Computer and go to Tools and then Folder Options.
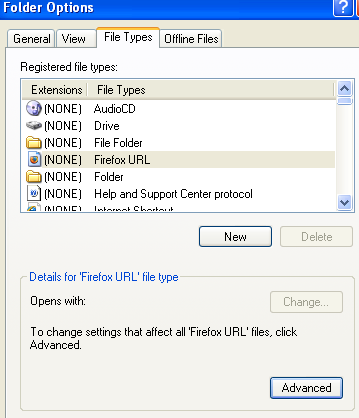
Step 2: Click on the File Types tab and you’ll see a listing of all the registered file types on your computer along with the extensions and the icon.
Step 3: Scroll down to the file extension you want to change the icon for and then select it in the list. After that, click on the Advanced button at the bottom of the dialog.
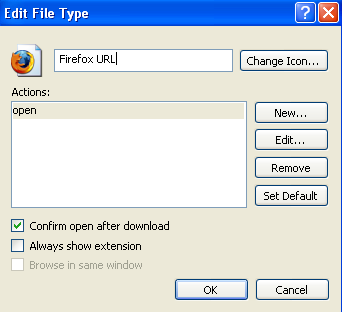
Step 4: Click the Change Icon button at the top right and choose your replacement icon.
That’s how simple it is to change the file icons in Windows XP and Windows Vista. If you’re changing a bunch of file icons or the entire set of system icons, then this method could be quite tedious. In that case there are a couple of freeware programs you can try out to help make the process of changing file icons easier.
Icon Phile - Allows you to add homemade icons to your desktop.
ActivIcons - makes it simple to change properties for various icons on your Windows desktop and in Explorer, plus attributes for many other desktop settings.
IconTweaker - is a freeware application that allows you to customize all your Windows icons.
FileTypesMan - is an alternative to the ‘File Types’ tab in the ‘Folder Options’ of Windows that can also be used to change system icons.
WinIcon Customizer - is the standard way to change all the icons on your Windows PC.
Hopefully that’s enough to get your going on your journey to changing all of your Windows icons! Enjoy!


No comments:
Post a Comment